Navigator Reports
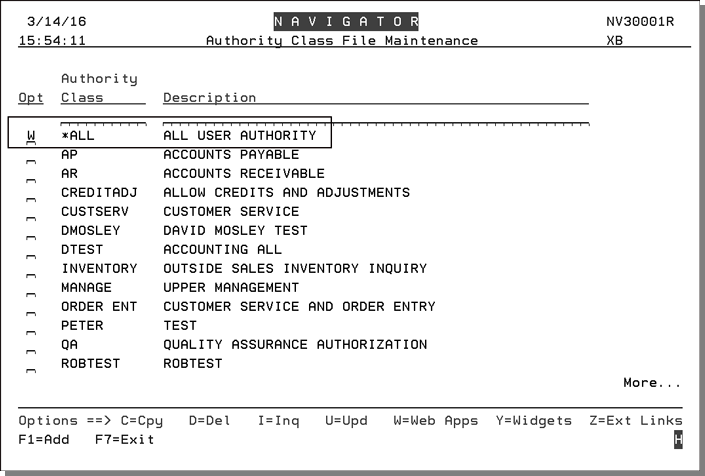
Access to specific reports has to be granted via the Navigator Authority Class (menu option NAV 2).
Access the Authority Class menu and enter a "W" to work with the Web Apps for an Authority Class.
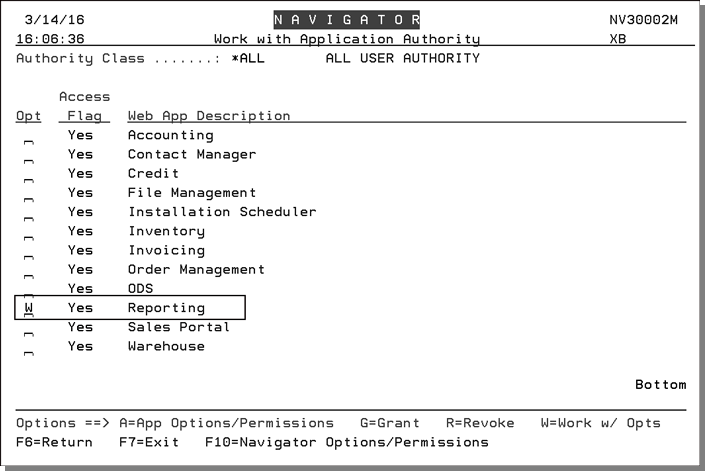
Find the Reports app and enter a "W" in its Opt field.
A listing of all the Navigator reports appears.
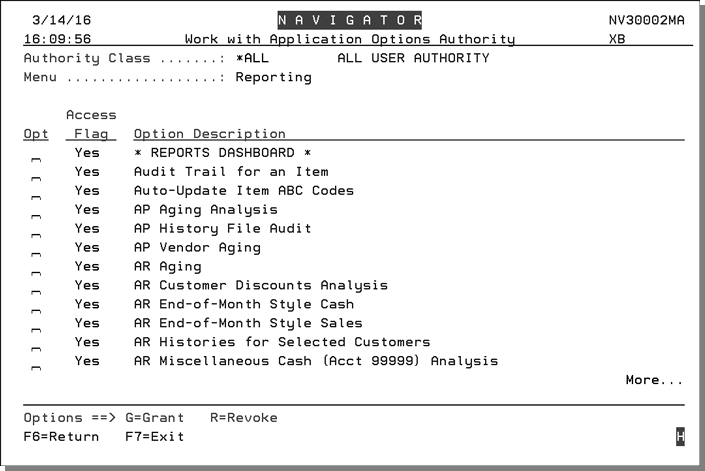
Grant or Revoke access to individual reports as needed.
- Access the Navigator Reports Application. The Saved Reports window opens.
- Click the icon in the upper left hand corner to expand the menu.
- Select a report to access its parameters.
-
Enter the necessary parameters and click Next in the bottom right hand to work through all the report parameters.
-
The last window for all of the reports allows you to confirm the report parameters.
-
Click Save to save the report and all its parameter settings.
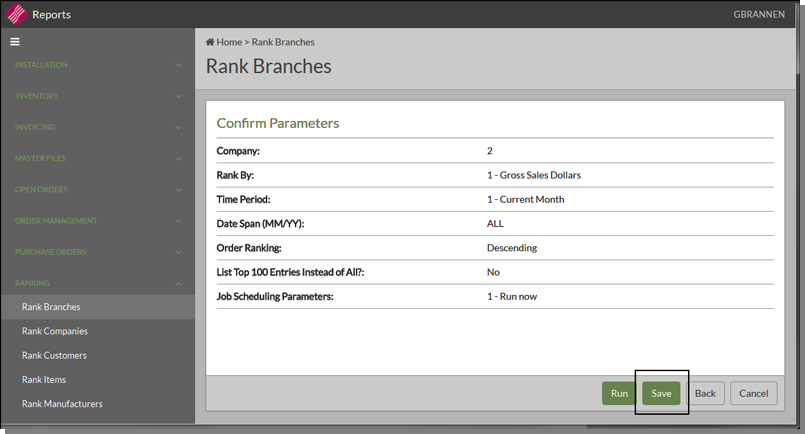 Click Run if you just want to generate the report and not save it. The report can be accessed by clicking ODS in the upper right hand corner and looking under Spoolfile Reports.
 -
Name the report and make it Public or Private.
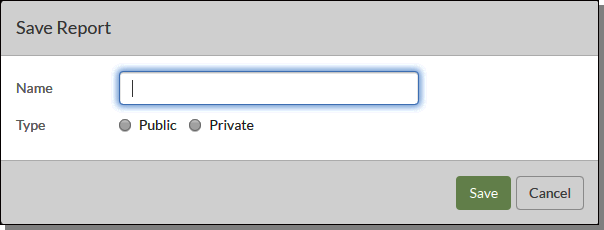
Only the person who created a Private report can access or edit it.
-
Click Save. The next dialog box allows you to schedule the report for automatic generation.

-
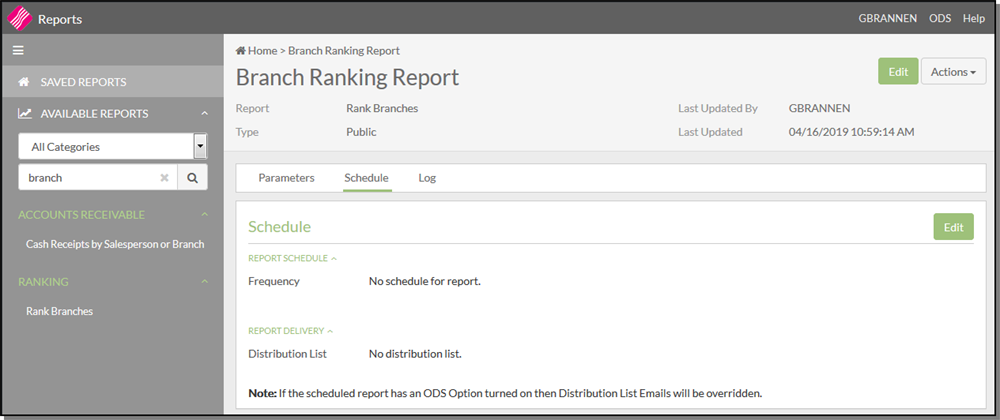
Clicking Yes takes you to the Schedule portion of the Reports.
-
Click Edit to assign a generation Frequency and a Distribution List.
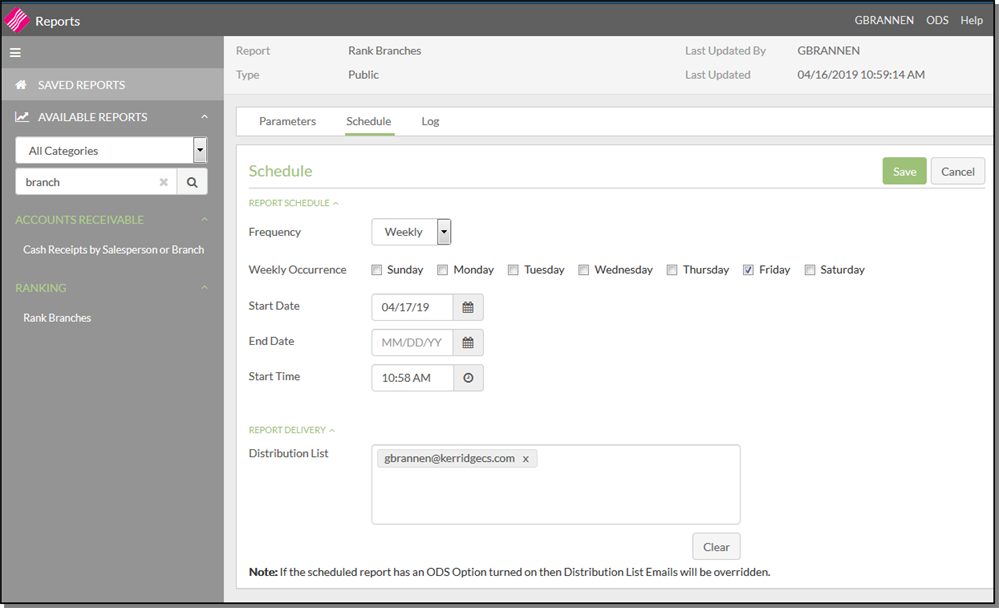 The note at the bottom of the page, If the scheduled report has an ODS Option turned on then Distribution List Emails will be overridden, lets you know that any emails already assigned to the report override those specified in the Distribution List box.
 -
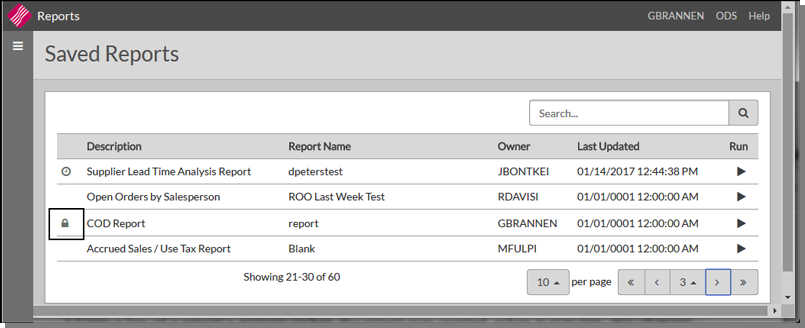
Click Save. When the report is displayed in the Saved Reports window, it now has a clock icon to its left.
The lock icon designates the report as a private report.

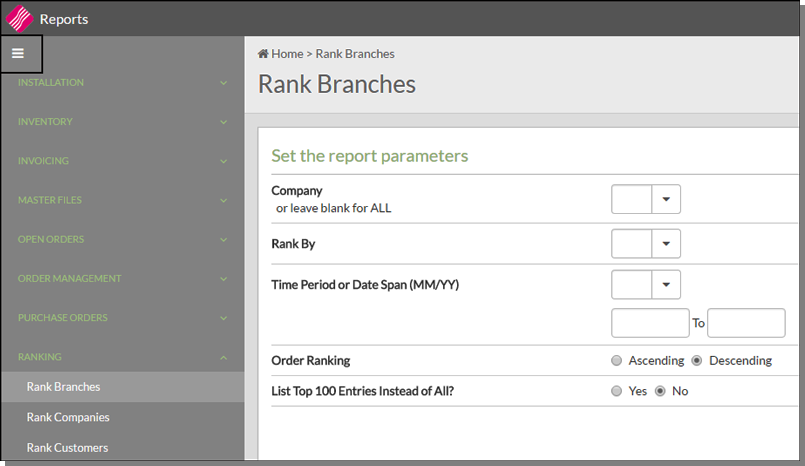
Each report has its own specific parameters.
Saved Reports
From the Saved Reports window you can:
- Access public reports
- Access only your private reports. Private reports are noted with a lock icon.
- Inquire into and/or edit the report parameters
- Run the report
- Schedule a report for automatic generation,
- View a log of a report's activity (when the report was created, when it was run, any changes to its scheduling, and any errors).
Actions
Open a saved report and click Actions in the top right hand corner.
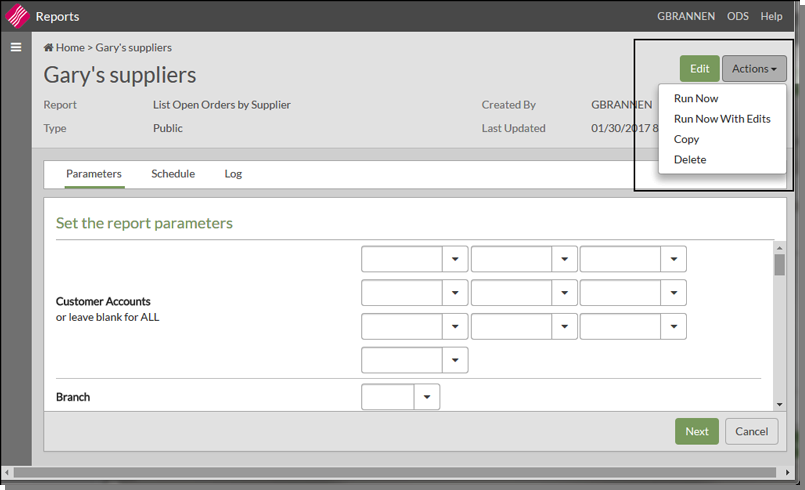
- Run Now - Allows you to manually run the report. An entry is made in the report log.
- Run Now with Edits - Brings up the report parameter window where you can make changes. Any changes made are not saved.
- Copy - Keeps the report settings but allows you to save it under a new name and change the Public/Private setting.
- Delete - Deletes the report and removes it from the Saved Window display.
The ODS heading in the upper right hand corner is where you can go to access reports.
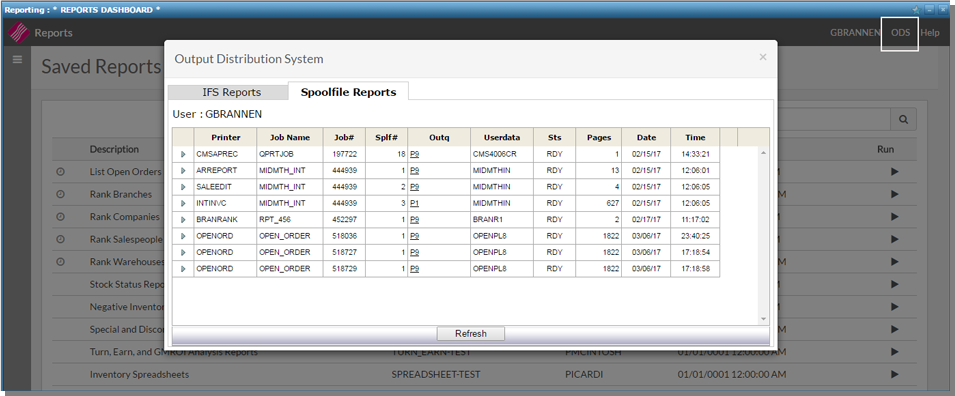
- IFS Reports - These reports are based on filtered data that has been extracted into a spreadsheet. Click the right arrow, in the far left column, for the report you want to work with. Select one of the options.
- Open - Opens the report as a spreadsheet. It can then be viewed, manipulated, or printed as needed.
- Delete - Deletes the report from the IFS drive.
- Spoolfile Reports - Includes all reports submitted via the system.
If you run a report and it does not automatically appear under this tab, your report could be running behind a big report that takes some time to run. When submitted, the reports go into a queue and the first ones submitted are the first ones generated.
If there are numerous reports on the spoolfile, performance could be hindered (i.e. it takes longer for the reports to display). A good practice is to do basic housekeeping on your spoolfiles, and to delete unwanted/unneeded spoolfiles. For the main reason that they take up unnecessary space on your system.
Notes:
Under the Spoolfile tab:
- ## in the Job Name column means the report was generated from the web based reports application. If a workstation ID appears (i.e. XP, XT, XW), it means the report was generated on an iSeries machine.
- The Open status designates the report is still being generated. You might see this status for some of the bigger reports.

